Apricot-Ginger Scones (Vegan), Revised

In the 3 years since I posted my recipe I have gradually changed some ingredients in these scones, so I thought it was time for a recipe revision.

I love crystalized ginger. I put it in my tea sometimes, or snack on it. But I realize that its combination of sharp and sweet may not be to everyone’s tastes, and I didn’t want it to overwhelm the other flavors so I used more than 1/8th cup, but less than 1/4 cup. The ginger and nutmeg play very well together. Also, because the crystalized ginger is lightly dusted with sugar — and the fruit is sweet, too — I can get away with very little added sugar in this recipe. The ginger is sometimes excessively dusted with sugar, so I do brush some of the sugar off before dicing because I don’t want an overly sweet scone. You might could pare the added sugar down even more, depending on how sweet you like your scones. I buy crystalized ginger as needed in the bulk section of the grocery store. Not all crystalized ginger is the same, however. Sometimes it’s sold as tough fibrous chunks. Avoid this if possible. It’s also available as thin oval pieces and this is better for most uses.

2 1/2 cups flour

1 Tbls baking powder

1/2 tsp salt

2 Tbls sugar

1/2 tsp ground nutmeg

1/2 cup (8 Tbls) margarine (I use Smart Balance Original)

1/2 cup dried apricots, diced

slightly less than 1/4 cup crystallized ginger, diced (I’d say between 1/8th cup & 1/4 cup)

2/3 cup soy milk (I used Silk organic unsweetened)

Preheat oven 425.

Stir together all the dry ingredients (first five ingredients). Then blend in the margarine with a fork, pastry cutter, or just use your hands, until it’s all worked in evenly. Toss in the apricots and ginger then stir in well so that it’s evenly distributed. Pour in soy milk. Stir until the dough starts to come together, then use your hands and knead it until it makes a firm round of dough. Divide into two more or less equal pieces. Shape each into a ball and then a flattened round probably 5 or 6 inches in diameter. Place the rounds on an ungreased baking sheet. Cut each into 6 equal wedge-shaped pieces. Separate the wedges on the baking sheet. Bake for 12 minutes or until done. (If the wedges don’t come out equal sized, then test the larger ones with a toothpick for doneness when you take them out of the oven.)

This recipe is a big favorite with my friends.

Lemon Poppyseed Scones (Vegan) Revised

20140820_143321

In the two and a half years since I posted the original recipe for this, I’ve made substantial changes, and just realized that I hadn’t posted the vegan version of this scone, which is in many ways an improvement.

It took me a long time to get this recipe just right. I ran through quite a few batches with unsatisfactory results first using lemon yogurt, then using fresh squeezed lemon juice, then a few more batches using bottled lemon juice, before I just gave up and went for the simplest flavor option. Lemon extract. Using an extract has a number of advantages. You don’t have to try to balance dry ingredients with wet ingredients, which means that if my recipe doesn’t appeal to you, you can use your own favorite plain scone recipe and add lemon extract to it, without having to substantially alter the existing recipe. Also, it comes in small bottles and has a longer shelf life than yogurt, lemons, or lemon juice so likely it won’t go to waste.

2 1/2 cups flour

1 Tbls baking powder

1/2 tsp salt

3 Tbls sugar

1 tsp poppy seeds

1/2 cup margarine

1/2 cup soymilk

2 tsp lemon extract

Preheat oven 425.

Stir together dry ingredients in a bowl: flour, baking powder, salt, sugar, and poppy seeds. Cut in margarine (I use Smart Balance Original) with a fork, pastry blender or your hands. I usually start by breaking up the margarine with a fork and then rub in the margarine with my hands until it’s a nice homogenous mixture. Measure milk, then add 2 tsp lemon extract to it. Pour milk and lemon extract mixture into the bowl with the dry ingredients. Stir rapidly with a fork until the dough starts to hold together in clumps, then use your hands to knead it very gently and briefly into a ball of dough. (Over-kneading will result in a tougher scone.) Divide the ball into two more or less equal pieces, shaping the dough into two equal flattened disks, about an inch in thickness. Place on ungreased cookie sheet. Cut each disk into six more or less equal wedges, then separate the wedges so there’s about an inch at least between them. Bake in preheated oven 12 minutes (or until  a toothpick comes out clean…your oven may vary from mine).

The scones are very tender and almost melt in your mouth right out of the oven. Serve with strong hot tea. If you’re not serving them immediately to a pack of ravenous friends, leftover scones are still very good the next day. Store in an air-tight container after the scones have cooled.

Cardamom Date Scones (Vegan)

Cardamom Date Scones

Cardamom Date Scones

As long-time followers of this blog know, I love doing variations on scones. Inspiration has struck again, and with Thanksgiving coming up, I thought now would be a good time to talk about “breakfast breads”. Pastries of various kinds figure into many breakfast menus, and though muffins aren’t a pastry, they’re usually included, but scones often don’t make the list. This is shame because you can do almost anything flavor-wise with a scone, and they’re easier faster and easier to make from scratch than any kind of pastry or muffin (with the possible exception of Every Day Muffins which are a make-ahead thing). So put aside your ideas of scones only for elevenses or late afternoon tea and think about fast easy scones for Thanksgiving morning when you’re up, in the kitchen, and looking for a delicious breakfast that doesn’t require the kind of extensive prep that the holiday meal does. You can browse the scone tag (which includes contributions from all the blog’s authors) or just go with these Cardamom Date Scones I’m making for breakfast on Thanksgiving this year. Flavored with cardamom, orange peel, and dates, these scones need very little added sugar, and the flavor is out of this world!

  • 2 1/2 cups organic flour
  • 1 Tbls baking powder
  • 1/2 tsp salt
  • 3 Tbls sugar
  • ½ tsp ground cardamom
  • ½ tsp dried orange peel (just the usual from grocery store spice aisle)
  • 8 Tbls margarine (1/2 cup)
  • ⅓ cup pitted Medjool dates, finely chopped
  • ½ cup organic soy milk (maybe a little more)

Preheat oven 425.

I used pitted Medjool dates for this. Dried date pieces would probably work too, but they’ll contribute less moisture to the recipe so a bit more liquid may be required.

Mix flour, baking powder, salt, sugar, and spices, then cut in margarine with a pastry cutter or fork. Work margarine in with your hands until evenly distributed and the mixture doesn’t have any conspicuous lumps. Then add the dates. If you used Medjool dates that you chopped yourself instead of dried pieces, you’ll need to break up the sticky clumps with your hands and work them into the mixture until it’s more or less homogeneous. Add the soy milk. The dough should come together with a little kneading and not be too dry. If it doesn’t feel right, you can add a tiny splash more milk.

Divide the dough into two balls, then flatten them into rounds (about an inch or so thick) on an ungreased baking sheet. Cut each round into six wedges. Separate the wedges so they aren’t touching.

Bake in preheated oven 12 mins or until toothpick comes out clean. Serve with a mug of strong black tea. I’ve noticed that the flavor of the spices (the cardamom in particular) seem stronger when the scones are fresh and hot, right out of the oven. But they’re still quite good the next day (assuming you have any left)!

Vegan Blueberry Muffins

20160525_183035

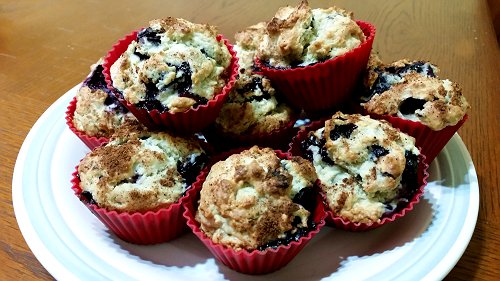
Blueberry muffins, hot from the oven, made with fresh blueberries

For me, blueberry muffins are a seasonal delight. I only use fresh blueberries, so I eagerly await the first blueberries of the season. This is a sunny summer treat. 🙂 I have for some time wondered how I could veganize my favorite recipe and still have a muffin as awesome as I’m used to. I’ve tried a lot of vegan baking recipes, and if they are something that traditionally have eggs in them, the recipes — no matter how well known the cookbook author is, or how many rave reviews the book got — well, they all, invariably turned out flat and godawful. (Vegan scones — which I’ve done here on the blog — are a different matter because they aren’t something that usually has egg, and substituting soy milk for dairy milk is perfectly fine.)

Before tackling this conversion I did some research on leavening. Because a lot of the problems vegan recipes have can be traced back to the lack of rising. A few ah-ha moments later and I was ready to make awesome vegan blueberry muffins! There are a few basic things you need to understand and then maybe you’ll brave converting your favorite muffins, too! The ingredients absolutely, must be at room temperature. You see this noted in cookbooks on baking all the time, but unless I’m baking a cake, I never did it. (Why I made the exception for cakes, I don’t know. Some weird cooking quirk of mine.) Why is the temperature important? The baking powder is activated by heat. If you start with a fairly cool mixture and there’s no eggs to give it any extra “oof”, then the baking powder may not be able to overcome the coolness enough, especially if you’re not baking it in a really hot oven. Yeah, it’s the heat thing again. Higher temperatures make the baking powder go “boom” and lots of instant heat makes it act fast before it loses its potency in the mixture (or something like that). So, preheat that oven! Also, I changed the oven temperature and cooking time to be a much hotter oven and a much shorter cooking time. Again, to give the baking powder as much help as I could. Muffins are acidic and that works well with modern baking powders; that’s part of what makes it “go”. Keep that in mind when you’re veganizing your recipes. The other big thing is air bubbles. I just whipped the hell out of the margarine (I used Smart Balance Original) and sugar. Mixtures need microbubbles because that’s what expands when the baking powder does its thing. On the other hand, muffins shouldn’t be mixed much once you start adding flour because then gluten starts forming and it screws up the muffin’s texture. Because vegan muffins don’t have eggs, mixing the whole mess like mad when you add the flour will only make the texture problem worse.

So, to recap: everything at room temperature, preheat oven, beat things well before you get to the stage of adding the flour, mix minimally once you add flour, pop it into a really hot oven. I hope all the above will help you troubleshoot vegan recipes and create your own.

Minor Rant: By the way, these muffins will not have that nuclear mushroom cloud type of muffin top. They will have a nice rounded dome like normal muffins should. If you make muffins and they are spilling over the edge when baked and look like a mushroom, then you are doing something wrong. Prior to gigantic deformed muffins coming in plastic packages, a good well-formed muffin had a nice domed top, with no edges going over the edge of the cups. Muffins that were so big that the tops spilled over the edges were considered to be muffins made by neophyte bakers who didn’t know what they were doing and over-filled the cups. Then some corporation decided to market gigantic deformed mushroom shaped muffins as if they were a Gift From God, and suddenly everyone thinks that muffins are supposed to have gigantic tops that can’t be contained in the muffin cup. I’ve been making muffins for decades, all types of muffins, and if you fill the muffin cups according to the directions on any recipe created prior to the corporate we-must-have-mushroom-shaped-muffins fad you’ll get muffins that have a nice raised dome rising up from the edge of the cup, but not spilling over it. It’s sort of shocking how quickly, and almost totally, corporations have managed to change people’s entire idea of what a muffin looks like. Suddenly people think that ol’ fashioned traditional muffins don’t look right because they’re not deformed! [shakes head]

IMG_20160526_110039This makes 18 muffins. I use 2 muffin pans: one dozen, plus a half dozen.

1/2 cup margarine, softened
1 cup sugar
2 flax eggs (see below)
1 Tbls baking powder
1/2 tsp salt
1 tsp vanilla
2/3 cup soy milk
3 cups organic all purpose flour
1 pint fresh blueberries
Nutmeg

Let all ingredients get to room temperature. If you don’t, your muffins may end up flat (ish).

Make flax eggs: Grind flax seed in coffee grinder or use flax meal. I’ve made flax eggs using flax seeds and also using Bob’s Red Mill Organic Flax Meal. Though the ground flax looks different depending on whether I ground it myself or used the pre-ground meal, I didn’t notice any discernible difference in the result. Mix 2 Tbls flax power with 6 Tbls water in a small bowl. Stir, then let set for at least 15 minutes. Stir again before adding to mixture.

Preheat oven 425.

Prepare muffin tins by greasing the cups, putting in paper liners, or putting in silicone liner cups. (I use silicone liners.)

Beat together softened margarine and sugar on medium speed. Do this for a couple of minutes, stopping to gently scrape down the sides of the bowl at least twice. The mixture should be light with a soft almost fluffy texture. This is an important step and shouldn’t be hurried because you’re whipping in tiny air bubbles which will help the muffins rise and give it a good texture.

Beat in 2 flax eggs, also on medium speed until mixture is smooth and creamy.

Add baking powder, salt, and vanilla. If you want to add nutmeg here you can, but the flavor is much better with the nutmeg on top.

Mix in 1/4 cup of smashed berries and juice.

Gently mix in 1 cup flour, then a splash of milk, alternating flour and milk until you’ve added it all. You should do this quickly, mixing as little as possible. Like all muffin recipes, mix just enough for it to come together a bit, otherwise you’ll have a tough muffin. Lumps are fine. Gently fold in the rest of the blueberries.

Divide batter evenly between 18 muffin cups. Sprinkle liberally with nutmeg.

Bake 18-21 mins (your mileage may vary) or until toothpick inserted in center comes out clean.

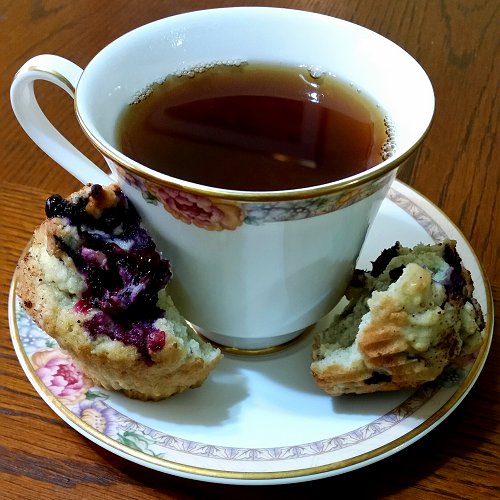
Cool long enough that you can handle them and eat them without damaging yourself. Pour a nice cup of tea and enjoy! 🙂

Steamed Broccoli with Ginger and Orange

20160412_192210
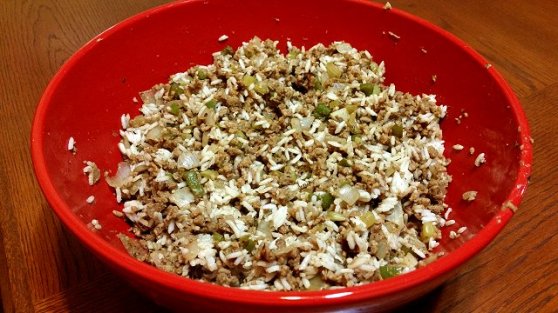
This is pretty simple and can be made either as a side dish, or a one-pot meal. You know how recipes call for just a tiny piece of a hand of ginger…and then you have a bunch of ginger left languishing in the fridge? Well, this recipe can take care of that. It uses a lot of ginger! All the heat and spiciness comes from the ginger. If this just looks too gingery for you, then try my own “tiny piece of ginger” stir-fry: Zingy Ginger Stir-fry. 😉

  • Two bunches of broccoli
  • 1/2 hand of ginger (!), minced or finely cut
  • 1 green bell pepper, coarsely chopped
  • 1 Tbls grated orange peel (dried, not fresh)
  • soy sauce
  • Simple Truth Meatless Griller Strips (optional)
  • small amount of oil

You could use freshly grated orange peel if you wanted too, but you might need to adjust the amount. The orange is just a mild complementary flavor in this recipe. But if you want more orange, use more! 🙂

Yes, this uses an excessive amount of ginger. That’s kind of the whole point. 😉 If you’re not sure how much a “half hand” is — every hand is a bit different — take a look at the pic to see how much I sliced up before I minced it.

20160412_184525

20160412_185017

I sometimes use Boyajian garlic oil for this, but regular cooking oil is fine. You really need just enough oil over medium heat to saute the ginger, and also the protein strips if you’re making this as a main dish. Sprinkle in the orange peel and toss with the Griller Strips until distributed. (If not using protein strips, toss with the broccoli.) Then add the chopped bell pepper and the broccoli florets, stir and toss a bit — but this isn’t really a stir-fry. Most of the cooking will be done with steam. Drizzle soy sauce liberally over the mixture and add a small amount of water (about 1/4 cup). Cover and turn the heat down a notch. Let cook while you prepare the rice (or whatever else you’ll be serving with it), about 20-25 minutes. Stir a couple of times if you think of it, just to make sure everything cooks evenly and the small amount of liquid hasn’t cooked away.

Serve with…whatever goes good with spicy food! The ginger gives this quite a kick!

20160412_192137

Three Loaves: A simple delicious idea!

This is a bit different from my usual posts… and it’s one of the most beautiful ideas I’ve ever heard. Have you heard of the Three Loaves Movement? Bread. Lots of loaves of every sort of bread you can imagine.

I found out about this from the most recent issue of Vegetarian Times. Jerry Stone founded the Three Loaves Movement to help fight hunger by making it simple, personal, and enjoyable. The idea is simple: you bake 3 loaves of bread, then you keep one loaf for yourself, you give one loaf to a friend, and give one loaf to a needy person. You can sign up for Three Loaves and you’ll get a bread recipe every month that makes three loaves. Some recipes are for breads that are recognizably sandwich bread, others are sweet breads, some are savory…the recipes (at least the ones I’ve been able to track down) are a mixture of vegan and vegetarian. Stone has a food blog, Cooking Stoned (a play on his name), which is a vegetarian blog, but oddly, doesn’t have an archive of Three Loaves recipes on it — only three recipes, and no links to Three Loaves recipes which were published on other blogs. 😦

If you want to join the Three Loaves Movement, sign up at: http://threeloaves.info/. And be sure and scroll down to look at variety of loaves posted to Instagram! Oh yum! 

This month’s recipe — the first since I signed up — has already been sent out, but once you confirm your email address, you’ll get a new recipe starting next month. In the meantime, you can go ahead and start baking with this month’s recipe: Vegan Multigrain Sandwich Bread.

I have two notes on this recipe. I’ve seen some of the other recipes and most use ingredients that most people already have on hand. I think this recipe’s author is a bit too optimistic to assume that most people will have these ingredient already on hand, or that they can just pop into the local grocery store and get them. But don’t let that put you off from joining Three Loaves! There are other recipes the project has used that are much more mainstream! And yes, I’m going to give you a link below!

The second note is about the amount of sweetener in this recipe. I would caution you about making the suggested substitutions because the author did not adjust the amount of sweetener or even note that the amount would need to be adjusted. Honey is significantly sweeter than sugar —you will always need less honey than sugar for the same effect — but I don’t know where agave syrup falls on the sweetness per volume scale. ?? So be wary of substituting honey or sugar for the agave syrup, unless you know how much to adjust the amount.

Now for the other recipes…I’ve been doing some internet sleuthing off and on since discovering Three Loaves and waiting impatiently for my first recipe to hit my inbox. So far I’ve found four more Three Loaves recipes, in addition to the three recipes on Jerry Stone’s food blog, and this month’s recipe. I’ve made a “3 loaves” tag on my Delicious bookmarking account, so you can browse all the links to Three Loaves recipes I’ve bookmarked. So far I’ve found: Blueberry and Thyme Bread, Ginger and Cardamom Bread, Dilly Buttermilk Sourdough Bread, Spice-swirled Cranberry Sweet Potato Bread, Sticky Caramel-Pecan Babka Loaves, Honey Wheat Brown Bread, and Cheesy Garlic Bread Challah, in addition to this month’s Vegan Multigrain Sandwich Bread.

I will bookmark more as I find them. If you have any links to a Three Loaves recipe (not just a recipe that makes 3 loaves, but one distributed by the Three Loaves Movement) that’s not in my bookmarks, please drop it in the comments and I’ll add it!

Now, let’s get baking! For ourselves, for our friends, and for those who really need some nice warm home-baked kindness!

Dirty Rice

20151021_190634

With Thanksgiving around the corner, and friends and relatives gathering to feast, you may want to think about adding this dish to the table. It’s hearty, tasty, vegan, and gluten-free. It can be served as a main dish, with veggies on the side, or as a filling and protein packed side dish. It’s fast and easy and there are a number of excellent variations you can do if this seasoning doesn’t grab you.

Dirty rice is a Cajun dish. It gets its name from the various meats in the traditional version, which color the rice to some extent and are the “dirt” in the rice. Typically it is mostly rice. In my vegetarian version the proportion of other ingredients to the rice is a bit more generous. This isn’t a family recipe, but I did have the traditional dirty rice a number of times when I was growing up. This makes a large amount — the bowl in the picture is 11″ across and 5″ deep — so how many servings it is depends on whether you serve it as a side dish, or as a main dish. Make sure you have a large skillet or large pot to make it in and a large bowl for serving — or storing leftovers.

You can use leftover rice for this recipe because the rice is cooked separately from the other ingredients. Adjust the amount of meatless crumbles and seasoning according to the amount of rice you use and what you want the proportions of rice to other ingredients to be. If you want this to look like more traditional dirty rice, you should use less meatless crumbles for the amount of rice. Traditional dirty rice is rice which uses veggies and meat for flavoring. In this recipe the rice and meatless crumbles share equal billing. There’s a fair amount of leeway in this recipe for variations, which I’ll get into after the recipe

  • 1 cup rice, which you will cook separately
  • 1 bell pepper
  • 1 onion
  • 2 stalks celery
  • Olive oil
  • 1 tsp file powder
  • 1 tsp liquid smoke
  • 1/2 tsp cayenne powder
  • 2 tsp thyme
  • 1 tsp parsley
  • 1 pkg Simple Truth Meatless Crumbles

Cook 1 cup of rice using whatever your usual cooking technique is. (I make the rice in the microwave.)  While rice is cooking, dice celery and bell pepper. Coarsely chop onion. How finely you dice or chop the veggies is to some extent a matter of preference. Saute the bell pepper and celery in a generous amount of olive oil over a moderate heat. Add onion and continue to cook for a few more minutes. Add the meatless crumbles. I use a whole package, but since the crumbles are frozen loose in the bag, you can use as much or as little as you want if you want to make a smaller amount or are using leftover rice.

Stir them in and let them thaw and cook with the veggies. Add seasonings and liquid smoke. Stir in well. You will probably need to add a little water once or twice while the mixture is cooking. I add about 1/4 cup at a time, as needed. It doesn’t need to cook long: just enough to cook the crumbles. The rice will probably be ready slightly before the mixture is, depending on type of rice and cooking method, but that’s okay. Just keep the lid on the rice so it remains warm. Then dump the rice and seasoned mixture into a big serving bowl and stir thoroughly until it’s well mixed.

A note on seasonings: File is a powder which is an ingredient in gumbo and other cajun seasoning. It’s made from ground sassafras leaves. If you can’t find it, it’s okay to omit it, though that will change the flavor slightly. The cayenne gives the dish its characteristic spiciness, but isn’t enough to really light you up. On the other hand, if you really like things to be very spicy, you can always add some heat to your plate when serving. This amount of cayenne, I think, perfectly balances with the other seasonings and doesn’t overwhelm the flavors. It’s not hot enough for my husband’s palate, though. He thinks this dish is perfect only after he’s adding a generous amount of Iguana Deuces Vicious Jalapeno sauce to it. 😉

Seasoning variations: If a Cajun-style dish isn’t to your taste you can change the seasonings. Onion, bell pepper, and celery are a common triad in Cajun cooking. I’d recommend dropping the celery if you convert it into a different type of ethnic dish, such as Italian. Substituting oregano and basil for the thyme and parsley would give it an Italian flavor. There are any number of flavor variations you could do on this: Italian, Mexican, Middle Eastern, Asian, Indian…It’s kind of a fast, easy, hash which can have pretty much any flavor you want.

Serving options, fancy and leftovers: One thing you could do to portion out the servings and make the presentation better, is to use the mixture as a stuffing for bell peppers. This adds an extra step because the bell peppers will need to be baked after stuffing, but on the other hand if you have the mixture as leftovers — or you did a make-ahead thing the day before — this is a nice variation because you’d need to heat up the mixture again anyway and the stuffed peppers can roast while while you kick off your shoes and relax after a long day. See here for my Stuffed Bell Peppers recipe. It uses a different mixture for stuffing, but prep for the bell peppers and cooking technique (note my little microwave cheat) would be the same no matter what you stuffed them with. Slicing the peppers lengthwise is another option for showing off the filling — and you can get away with heaping it up a bit, whereas stuffing a whole pepper filling is limited to the capacity of the pepper.

Gingerbread Scones (Vegan)

20151018_154001

A nice cup of tea and a gingerbread scone. Ahhhh….

If my last post, Irish Black Ginger Cake, was a bit too strong for you, try this mellow taste of autumn instead. This is an adaptation of my Ginger Bread recipe (which I also adapted to make gingerbread men). What I did to adapt this into scones was to eliminate the egg (which isn’t needed in any of my scone recipes), increase the flour slightly (because scone dough needs to be less wet than a quick bread), then adjust the levening and amount of margarine to be like my typical scone recipes. Because I didn’t touch any ingredients that contributed to the wonderful autumn flavor, these taste just like my Ginger Bread. Lovely! If you’re curious about how I come up with my scone recipes and how you can do adaptations of your own, check out my Fakin’ It When You Bake It: Scones post. For more scones (mine and others) check out the scones tag.

2 1/2 c. flour
1/4 c. sugar
1 Tbls baking powder
1/2 tsp. salt
3 tsp. ginger
1 tsp. cinnamon
1/2 c. margarine (1 stick or 8 Tbls)
1/2 c. soy milk
1/2 c. molasses

Mix dry ingredients. Cut in margarine until it’s worked in well and the mixture is crumbly.

Measure milk and molasses and stir the two together. Pour into scone mixture. Stir well until dough starts to come together, then knead a bit with your hands until it comes together into a smooth dough. Divide into two balls, flatten each on baking sheet and cut each into six wedges. Separate the pieces slightly so that they aren’t touching.

Bake 425 for 12-14 mins, or until done. (Your oven may vary.)

Zingy Ginger Stir-Fry

Zingy Ginger Stir-Fry

Zingy Ginger Stir-Fry

This is another of my stir-fry improvisations, a spicy gingery variation on Stir Fry Improvisation which I posted last year. There are some notable differences. I served this over Red Chile Fettuccine instead of rice, and I used a spicy oil instead of regular oil…and then there’s the ginger! 🙂

I also used a different brand of protein strips, though this will probably be good most brands.

  • Simple Truth Meatless Griller Strips
  • 1 onion, chopped
  • 1-3 cloves garlic (depending on how much you like garlic or how strong the garlic is)
  • fresh broccoli florets (I used 3 small heads of broccoli, but one large might be enough.)
  • 1 inch piece of fresh ginger, peeled and minced, or cut into fine slivers
  • soy sauce
  • Boyajian Jalapeno oil, or other spicy oil
  • Al Dente Red Chili Pepper Fettuccine

The amount of the griller strips and fettuccine depends on how many servings you’re making and whether this is meant to be a one-bowl meal. A half package of the fettuccine is two very generous servings. A whole package would easily feed four hungry people and might be stretched to five. I admit I guestimate the amount of the griller strips I use depending on how many servings. I just sort of break the frozen pieces out of the package and think, that’s about enough for one, two, three…etc. It really depends on how much protein you want per person. If this is a side dish, you could omit the protein strips. They soak up flavor well, but don’t contribute as much to the overall flavor of the dish as all the other ingredients — including the spicy fettuccine!

If serving over fettuccine, keep in mind that though it will take a bit of time to get the big pot of water to a boil, it takes just a few minutes for the pasta to cook! The whole meal comes together fairly quickly, even with the prepping vegetables and boiling water. It’s not instant, but if you’re hungry, you can throw this together and cook it before you reach the point of gnawing on the kitchen utensils. (I speak from experience. About the fast easy meal, that is. Not about gnawing kitchen utensils. Haven’t done that. Don’t recommend it.)

Cook the frozen griller strips in a small amount of the oil. Prep the vegetables, including ginger. Toss onions, garlic, and ginger into the wok with the griller strips. (You may need to add a bit more oil.) Toss and cook over a medium heat. I added the broccoli a bit later after the onions had started getting soft. After adding the broccoli, drizzle soy sauce over the mixture, toss and stir well, then cover and let simmer until broccoli is done, stirring occasionally. Serve over rice for a less spicy version. Serve over Red Chili Pepper Fettuccine for a somewhat spicier version.

The “zing” in this dish comes from three ingredients. All together, it’s not super-hot, but if even mildly spicy food doesn’t agree with you, you can make some substitutions and still have a flavorful dish. Rice or a milder noodle will take some of the zing away, and using a plain cooking oil (or garlic oil instead of garlic) will take most of the rest of the zing from the dish, but…the dish will still sing with a bit of zing if you use a big one inch chunk of fresh ginger in it!

Mexican Chipotle Field Roast Sausages

20150727_184911

Mexican Chipotle seasoned sausages.

Though I do soy hotdogs occasionally, this is my first time to try a vegan sausage. It sounds like an oxymoron, doesn’t it? I mean, traditional sausage is about as far opposite to vegan, vegetarian, or healthy as you can get. The Field Roast people do perhaps too good of a job of imitating the whole sausage experience. These are good. I tried the Mexican Chipotle version. Spicy!! They also make sausage with Italian seasoning, and one which is apple and sage. I pan fried these but the packaging says they can be pan-fried or grilled. They seem substantial enough to hold up to grilling, and I’ll try that next.

There are a couple of not-great things you should be aware of.  The individual sausages are encased in a very tough plastic wrapper, which naturally needs to be removed before cooking. They recommend slitting the casing lengthwise to remove them. I agree, but cutting the plastic was delicate process, trying not to damage the sausage, and the plastic was tough to cut. On the other hand, despite the thickness and toughness of the plastic, the sausages started leaking in the fridge after we bought them, so we had to clean up the orange grease and put them in a baggy until we cooked them. So even with tough plastic, be aware that the twisty tied ends may leak alarming orange grease. And that alarming orange grease is the other thing that I had a problem with. I get that sausages are supposed to be greasy, and the grease was orange because of all the spices, but by the time I managed to get the plastic on the sausages off, my hands were covered with thick orange grease, the sink was splattered with orange grease, the counter had orange grease drippings and splatter on it. Do not make these sausages wearing anything that you can’t afford to get grease on! Because it was basically everywhere.

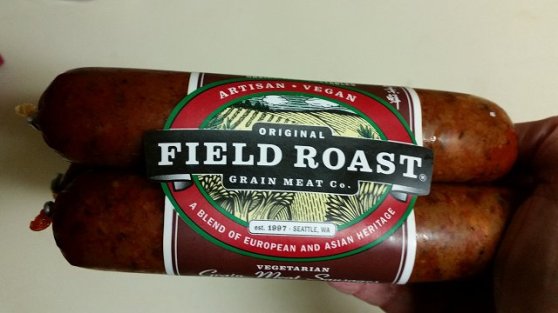
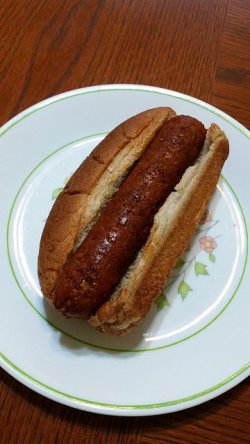
But once past the unpleasant unwrapping and clean up, it was smooth sailing! There are four sausages per package. They are bigger than hot dogs and will really fill a hot dog bun! The sausages held up to pan frying well, though they did tend to stick a little (probably because all the grease ended up everywhere except the pan, probably should’ve opened the package over the pan). They didn’t brown up substantially. They were naturally rather brown, so it was hard to tell when they were “browned”, but I cooked them for a while, then slid them into buns. There was some discussion about what condiments to put on these Mexican Chipotle sausage dogs, given that they were already stuffed full of seasonings. My husband liked the traditional mustard option. I didn’t think mustard really complimented the spices, so I tried a little mayonnaise. It wasn’t bad, but it wasn’t great. I preferred the bare bun option. These sausages are so packed with flavor…and the flavor is hot and spicy…that my best guess is that BBQ sauce would be the best thing on it, if it wasn’t a super spicy BBQ sauce. This Mexican Chipotle version of the sausages has plenty of kick. You could have a satisfying hearty, spicy meal on a bare bun. Even though I love spicy food, I’d hesitate to add anything with much more spiciness to this. A regular not-too-hot BBQ sauce, or a very bland chili for a chili dog. (If your chili didn’t turn out as hot as you’d hoped, put it on these dogs for extra zing!)

For these Mexican Chipotle seasoned sausages, I recommend refried beans as a side dish. The flavor was complementary and it seem to cut the heat a bit when the spiciness built up after a few bites.